
DIY Star Ceiling Cost: 2026 Real Budget for Fiber Optic Kits vs Premade Panels

A DIY star ceiling costs anywhere from about $300 to $5,500+ in materials in 2026, depending on which route you take. A budget online kit can light a small ceiling for a few hundred dollars. A pro-grade, hand-drilled fiber optic build for a full room usually lands between $4,000 and $5,500+. And installing premade star panels yourself runs about $55 per square foot — roughly $5,500 for a 10′×10′ ceiling.
The sticker price is only half the story. The real DIY star ceiling cost also includes tools, drywall repair, an outlet at the ceiling, and the 40 to 56 hours you'll spend on a ladder or in the attic. At American Starlight Ceilings, we talk to DIYers every week who started with a $60 kit and ended up rebuilding the whole job — so we wrote the budget guide we wish they'd read first.
Below, you'll see the three DIY paths side by side, a line-by-line material budget, the hidden costs most guides skip, real room budgets from 8′×10′ to 15′×15′, and an honest answer to the big question: is DIY actually cheaper than premade panels?
✦ Quick Answer: How Much Does a DIY Star Ceiling Cost?
Your DIY budget depends on the method. Here are the 2026 numbers that matter:
- Budget plug-in kit (16W, 500–1,200 strands): about $45–$220 per kit; a small room usually needs 2–3 kits, so $300–$900 all-in with supplies
- Pro-grade hand-drilled fiber optic build: about $4,000–$5,500+ in materials for a typical room
- DIY install of premade panels: about $55 per sq ft — $5,500 for 10′×10′, $7,920 for a 12′×12′ field
- Hidden costs: drywall patching $200–$600+, ceiling outlet, drill bits, and scaffold or ladder rental
- Time: hand-drilled builds take one person 5–7 full days; DIY panels take 1–2 days with a helper
- Star density: premade panels deliver 7–11 stars per sq ft; most hand-drilled DIY jobs end up with about half that
- Pro install for comparison: about $77 per sq ft installed, with a 2-year product warranty and lifetime workmanship warranty
The 3 Ways to DIY a Star Ceiling (and What Each Really Costs)
When people search "DIY star ceiling cost," they're usually comparing three very different projects. They share a name, but they don't share a budget, a timeline, or a finished look. Knowing which one you're actually pricing is the first step to an honest budget.
Path 1: Budget plug-in fiber optic kits
These are the small kits sold on big online marketplaces. A typical kit includes a 16-watt LED light engine with a remote and a bundle of 500 to 1,200 thin fiber strands. Prices run from about $45 to $220 per kit, with "twinkle" models at the higher end.
They work well for a closet ceiling, a car headliner, or a small accent area. For a full room, you hit limits fast. The strands are often only 6.5 to 10 feet long, which may not reach from the light engine to the far side of a room. Most kits use one fiber size, so every star looks the same. And a 16W engine can only light so many strands brightly.
Path 2: Pro-grade hand-drilled fiber optic build
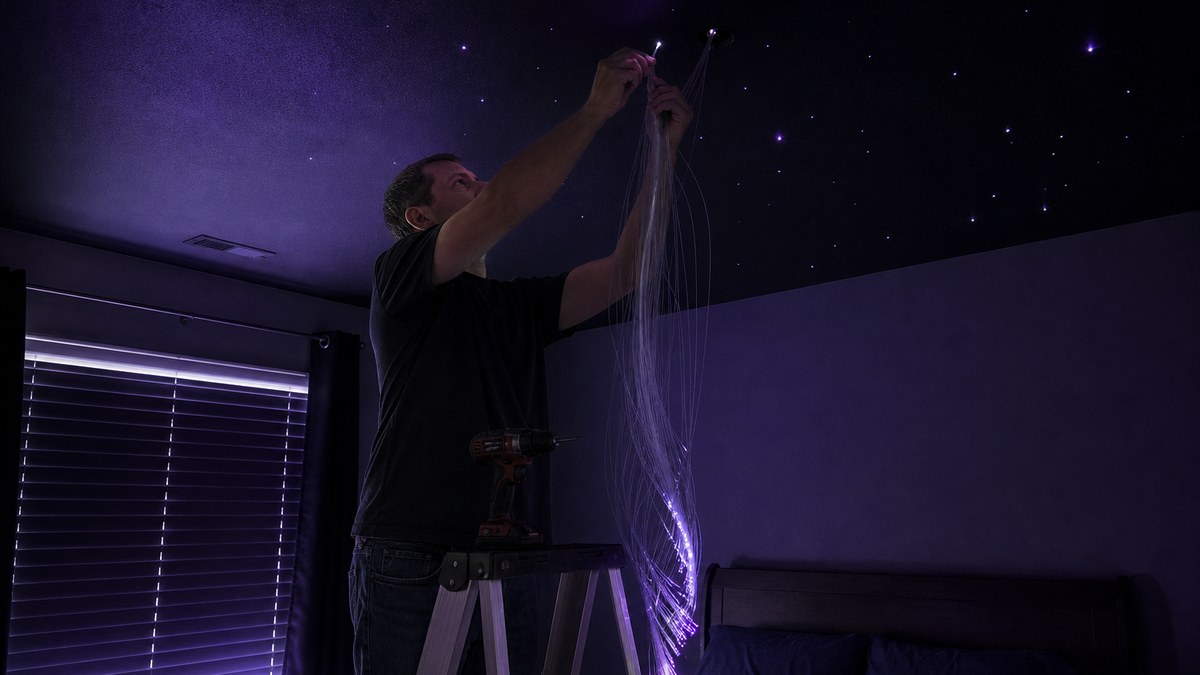
This is the "real" DIY star ceiling. You buy commercial light engines, bulk fiber in mixed diameters, and either drill through your existing drywall or build a new false ceiling of boards and fabric. Every star is a hole you drill and a strand you thread, glue, and trim.
The result can look great — but the material bill is much higher than most people expect. A quality light engine costs around $500, and most rooms need at least two. Bulk fiber spools run over $1,000 each. Add boards, fabric, anchors, adhesive, and paint, and a typical room reaches $4,000 to $5,500+ before you've spent a week on a ladder.
Path 3: Premade star panels you install yourself
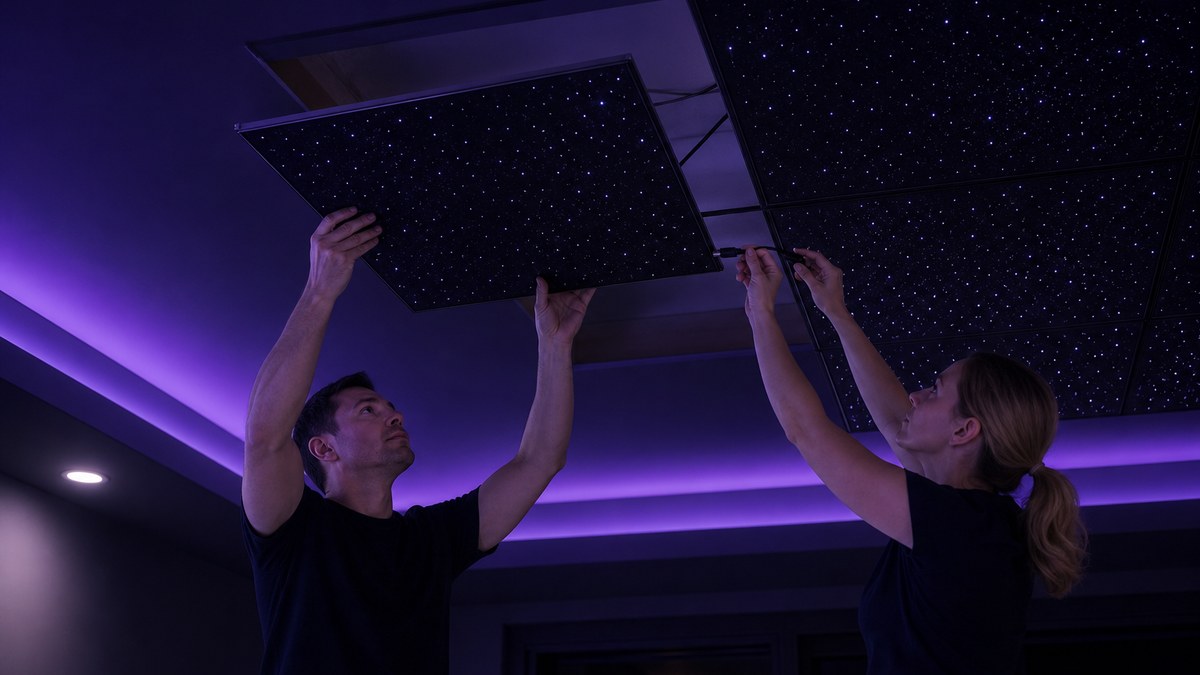
Premade panels have the fibers and light engine already built in. You mount them to the ceiling or drop them into a grid, connect them with Cat5 cables, and plug into one ceiling outlet. Panels cost about $55 per square foot delivered, and you skip the drilling, threading, and attic work entirely. Our star ceiling panels buying guide explains sizes, types, and star counts in detail.
| DIY Path | Material Cost (10′×10′ room) | Time (DIY) | Finished Look |
|---|---|---|---|
| Budget plug-in kits | $300 – $900 | 2–4 days | Sparse, uniform stars; best for small accents |
| Pro-grade hand-drilled build | $4,000 – $5,500+ | 5–7 full days | Good to great, depends on skill |
| DIY premade panels | ~$5,500 ($55/sq ft) | 1–2 days with a helper | Dense, even, factory-finished sky |
| Professional panel install | ~$7,700 ($77/sq ft) | 1–2 days (crew) | Factory-finished + lifetime workmanship warranty |
Key takeaway: The gap between a "real" DIY fiber optic build and DIY premade panels is usually small — often just a few hundred to a couple thousand dollars for a 10′×10′ room. The gap in time and finished quality is much bigger.
DIY Star Ceiling Material Costs: Line-by-Line Budget
If you're planning a hand-drilled fiber optic ceiling, here's where the money goes. These are typical 2026 ranges for a 100 to 150 square foot room. Your numbers will move with ceiling size, star density, and the effects you want.
| Item | Typical Cost | Notes |
|---|---|---|
| LED light engines (2+) | $1,000 – $1,500+ | About $500 each for quality engines; most rooms need at least two |
| Bulk fiber optic strands | $1,000 – $2,000+ | Spools often exceed $1,000 each; mixed diameters look more natural |
| Boards / false ceiling panels | $400 – $900 | Needed if you build a new layer instead of drilling existing drywall |
| Acoustic or black fabric | $200 – $500 | Optional, but helps theaters and hides imperfect holes |
| Adhesive, anchors, paint, cutters | $150 – $400 | Fiber glue, flush cutters, drill bits in several sizes, black paint |
| Total materials | $4,000 – $5,500+ | Before tools, repairs, and your time |
Why are light engines so expensive?
The light engine is the only part of a fiber optic star ceiling that makes light. A good one runs cool, has a long-life LED rated around 50,000 hours, includes a quiet fan or passive cooling, and offers smooth dimming. Cheap engines often have loud fans, uneven output, and short lifespans. Since every star depends on the engine, this is the last place to cut corners.
How much fiber do I need?
Plan for 7 to 11 stars per square foot if you want a sky that looks full. A 10′×10′ ceiling at that density needs 700 to 1,100 strands. Each strand has to reach from the light engine to its hole, plus a little slack. In a 12′×12′ room with the engine in one corner, some strands need to be 15 feet or longer. That's why bulk fiber costs add up so quickly — and why short-strand budget kits struggle in full rooms.
Hidden DIY Star Ceiling Costs Most Guides Skip
The parts list is only the beginning. These are the costs DIYers tell us surprised them most.
Drywall repair and painting
Drilling hundreds of holes from below leaves dust, chipped paint, and the occasional misplaced hole. Many hand-drilled jobs need drywall patching and a fresh coat of ceiling paint, typically $200 to $600+ if you hire it out. Premade panels avoid this completely because nothing is drilled through your ceiling for the stars.
Attic access and safety
Threading fibers from above usually means working in the attic. In summer, attics often top 140°F, and insulation has to be moved and put back. If you don't have attic access — say, in a basement or a second-floor room with living space above — you'll need to build a false ceiling, which adds boards, framing, and days of labor.
Power at the ceiling
Your light engines need an outlet nearby. If there isn't one in the attic or above the ceiling, you may need a licensed electrician to add one. Even premade panels need one outlet at the ceiling, so plan for it early on any route.
Tools and equipment
Expect to buy or rent a drill with several bit sizes, flush fiber cutters, a sturdy ladder or rolling scaffold, a hot glue gun or fiber adhesive, and good lighting. If you don't own these, add a few hundred dollars to your budget.
Your time
A hand-drilled build takes one person about 5 to 7 full days — roughly 40 to 56 hours. Put any value on your weekend time and the "cheap" option starts to look different. By comparison, a two-person crew installs premade panels at 75 to 90 square feet per day.
Real-world example: A homeowner budgets $1,200 for a "simple" DIY bedroom sky. After two engines, enough fiber to reach the far wall, a drill bit set, scaffold rental, and drywall touch-up, the true total lands near $4,500 — plus a full week of work. That's within about $1,000 of buying premade panels for the same 10′×10′ ceiling.
DIY Star Ceiling Cost by Room Size
Here's how the three DIY paths compare across common room sizes. Panel prices use our standard $55 per square foot for panels only and $77 per square foot fully installed. Hand-drilled ranges are typical material costs and don't include your time.
| Room | Size | Hand-Drilled DIY (materials) | DIY Panels (~$55/sq ft) | Pro Installed (~$77/sq ft) |
|---|---|---|---|---|
| Nursery / small bedroom | 8′ × 10′ (80 sq ft) | $3,000 – $4,500 | $4,400 | $6,160 |
| Standard bedroom | 10′ × 10′ (100 sq ft) | $4,000 – $5,500+ | $5,500 | $7,700 |
| Primary bedroom field | 10′ × 12′ (120 sq ft) | $4,500 – $6,000+ | $6,600 | $9,240 |
| Home theater center field | 12′ × 12′ (144 sq ft) | $5,000 – $7,000+ | $7,920 | $11,088 |
| Full home theater ceiling | 15′ × 15′ (225 sq ft) | $7,000 – $10,000+ | $12,375 | $17,325 |
For a full breakdown of every factor that moves the price — ceiling height, layout, effects, and location — see our complete starlight ceiling cost guide.
Custom effects cost extra on every path
Twinkling, shooting stars, RGB color changing, smart home control, and constellation mapping are custom add-ons with extra cost. They are not included in base panel pricing. As a guide, twinkle typically adds $300–$1,000+, shooting stars $500–$2,000+, RGB $500–$2,000+, smart home integration $500–$1,500+, and constellation mapping $1,000–$3,000+. DIYers pay for these too — in pricier engines, extra fiber, and more wiring. Our custom star ceiling cost guide breaks down every effect.
Compare Your DIY Budget to a Real Quote
Send us your room size and we'll price panels only (for DIY) and fully installed side by side, so you can see the true difference before you buy a single strand of fiber. Free, no obligation.
(702) 738-2218 Get Your Free Quote →Is a DIY Star Ceiling Cheaper Than Premade Panels?
Sometimes — but usually by less than people think. A budget kit is clearly cheaper, but it's not the same product. Once you compare a full-room, full-density DIY build to premade panels, the savings shrink to a fraction of the project cost.
| Factor | Hand-Drilled DIY Kit | Premade Star Panels |
|---|---|---|
| Material cost (10′×10′) | $4,000 – $5,500+ | ~$5,500 |
| Labor time | 5–7 days, one person | 1–2 days with a helper |
| Attic access | Usually required | Not needed |
| Star density | Often 3–5 per sq ft | 7–11 per sq ft |
| Drywall damage | Hundreds of holes; patching common | None |
| Acoustic benefit | Only if you build it in | Built in (NRC 1.0+ options) |
| Product warranty | Varies by part, often short | 2-year product warranty |
| Resale and removal | Permanent; hard to undo | Panels can be removed or moved |
When DIY makes sense
- You're lighting a small area — a closet, alcove, or reading nook — where a budget kit is enough.
- You have easy attic access, real woodworking skill, and a week to spare.
- You enjoy the build itself and accept that the finish depends on your patience.
When premade panels make more sense
- You want a full-room sky with dense, varied stars that looks professional.
- There's living space or no attic above the room, such as a basement or condo.
- The room is a home theater or media room that also needs acoustic treatment.
- You want the job done in a weekend, not a week.
The good news: premade panels can still be a DIY project. You can buy panels only at about $55 per square foot and install them yourself. Our DIY starlight ceiling kits page walks through every option, and our starlight ceiling panels page has full specs.
How to Install Premade Star Panels Yourself
If you choose the DIY panel route, the process is far simpler than a hand-drilled build. Here's what a typical weekend looks like.
- Measure and plan: Multiply length by width for square feet. Divide by 4 for 2′×2′ panels or 8 for 2′×4′ panels. Leave an 8–10 inch border at the walls for the most natural look.
- Add power: Make sure there's one outlet at or above the ceiling. If not, have an electrician add one before install day.
- Mark the layout: Snap chalk lines and mark around lights, vents, and speakers.
- Mount the panels: Attach them to the drywall with the supplied hardware, or drop them into your existing grid if you have a suspended ceiling.
- Connect and test: Link panels with Cat5 cables in a daisy chain, plug in, and test dimming before you call it done.
Most homeowners with a helper finish a 10′×10′ room in one to two days. If you'd rather have it done for you, professional starlight ceiling installation adds about $22 per square foot and includes a lifetime workmanship warranty on the labor.
Pro tip: You don't have to cover every inch. A center field with a plain border keeps the "wow" and can cut square footage — and cost — by 30% or more. It's the easiest way to bring a premade panel budget closer to a DIY kit budget.
Common DIY Star Ceiling Mistakes That Raise the Cost
These are the errors we see most often when people call us to finish or fix a DIY job. Each one adds money, time, or both.
- Buying too little fiber. Strands that come up short mean a second order and a second weekend in the attic.
- Using one fiber size. Identical stars look like a pegboard. Mix at least two or three diameters for depth.
- Choosing an underpowered engine. Too many strands on one small engine produces dim, uneven stars.
- Clustering or gridding stars. Random spacing with varied density looks natural; even rows don't.
- Skipping the test before trimming. Always power the system and check every area before you cut fibers flush.
- Ignoring sound. In a theater, a hard drywall ceiling causes echo. Acoustic star panels solve both problems at once — see our acoustic star ceiling panels guide.
Best Rooms for a DIY Star Ceiling
Bedrooms and nurseries
Bedrooms are the most popular DIY star ceiling project. A soft white sky with dimming is calming and simple to control. For layout ideas, see our starlight ceiling for bedroom page.
Basements and game rooms
Basements usually have living space above, so attic threading isn't an option. That makes premade panels — especially lay-in tiles for drop ceilings — the clear DIY winner here.
Home theaters and media rooms
Theaters benefit most from acoustic star panels. You get room treatment and stars in one product. Our home theater starlight ceiling page shows popular layouts and sizes.
Specialty spaces
Large custom builds, ceiling coves, and commercial spaces often need custom fiber layouts. Our sister team for fiber optic lighting solutions handles big custom fiber projects, and if your project extends outdoors, our partners in pool and aquatic lighting can finish the backyard.
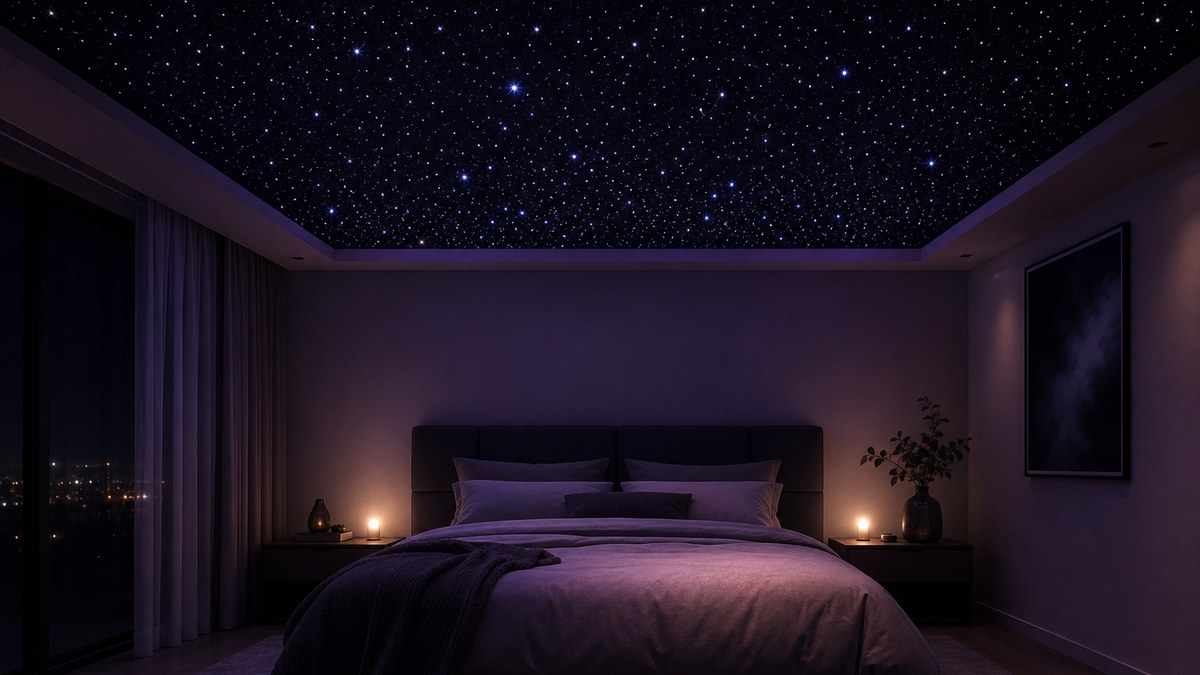
Want to see what different approaches look like in real rooms? Browse our starlight ceiling gallery, read our complete guide to a starlight ceiling in your house, or check our residential starlight ceilings page.
When to Call a Pro Instead
DIY isn't always the right call. Consider professional installation if your ceiling is over 10 feet high, the room is larger than 200 square feet, you want custom effects wired in, or you simply want a lifetime workmanship warranty. Our guide to finding a star ceiling installer near you lists the questions to ask, and our locations page shows the cities we serve nationwide. For one-of-a-kind shapes and layouts, see our custom starlight ceiling design options.
Commercial Lighting Applications From Our Network
Star ceilings are often one piece of a bigger lighting project. In Texas, our partner network covers the rest of the building, with LED lighting solutions in Dallas, Fort Worth LED lighting, LED lighting in Plano, commercial LED lighting in Arlington, and Irving LED lighting services. For larger jobs, there's Texas-wide LED lighting and wholesale LED solutions.
Building a new theater room, studio, or backyard office? Modular building solutions and modular structures in Dallas can deliver the space, ready for a star ceiling.
Frequently Asked Questions About DIY Star Ceiling Cost
How much does a DIY star ceiling cost?
A DIY star ceiling costs about $300 to $900 with budget plug-in kits for a small area, $4,000 to $5,500 or more in materials for a pro-grade hand-drilled fiber optic build in a typical room, or about $55 per square foot if you install premade star panels yourself.
Is it cheaper to DIY a star ceiling?
Only slightly for a full room. A quality hand-drilled DIY build often costs $4,000 to $5,500 or more in materials for a 10x10 room, while premade panels for the same room cost about $5,500. DIY also takes one person 5 to 7 days versus 1 to 2 days for panels.
How much does a fiber optic star ceiling kit cost?
Budget fiber optic star ceiling kits with a 16W light engine and 500 to 1,200 strands cost about $45 to $220 each. Commercial light engines cost around $500 each, and bulk fiber spools often cost over $1,000, which is why full-room DIY builds reach $4,000 or more.
How many fiber optic strands do I need for a star ceiling?
Plan for 7 to 11 stars per square foot for a full-looking sky. A 10x10 ceiling needs about 700 to 1,100 strands, and a 12x12 ceiling needs about 1,000 to 1,600 strands, using mixed fiber sizes for a natural look.
How long does it take to install a DIY star ceiling?
A hand-drilled fiber optic star ceiling takes one person about 5 to 7 full days for a typical room. Premade star panels take about 1 to 2 days with a helper, and a professional 2-person crew covers 75 to 90 square feet per day.
Do I need attic access for a DIY star ceiling?
For a hand-drilled fiber optic ceiling, usually yes, because fibers are threaded down from above. Without attic access you need to build a false ceiling. Premade star panels do not need attic access and only require one outlet at the ceiling.
Can I install premade star ceiling panels myself?
Yes. Premade panels are the easiest DIY option because the fibers and light engine are built in. You mount the panels, connect them with Cat5 cables, and plug into one ceiling outlet. Panels cost about $55 per square foot delivered.
Are twinkle and shooting star effects included in DIY kits or panels?
Not in base pricing. Twinkle, shooting stars, RGB color, smart control, and constellation mapping are custom add-ons with extra cost, typically $300 to $3,000 or more depending on the effect.
What are the hidden costs of a DIY star ceiling?
Common hidden costs include drywall patching and paint at $200 to $600 or more, adding an outlet at the ceiling, drill bits and fiber cutters, ladder or scaffold rental, extra fiber when strands come up short, and 40 to 56 hours of your time.
What warranty comes with a star ceiling?
DIY kit warranties vary by part and are often short. Our star ceiling panels include a 2-year product warranty, and professional installation adds a lifetime workmanship warranty on the labor.
Get the Real Numbers for Your Ceiling
Whether you want panels delivered for a DIY weekend or a complete turnkey install, we'll map your sky and send a clear quote with product and installation priced separately. Every panel includes a 2-year product warranty, and every professional install includes a lifetime workmanship warranty.
(702) 738-2218 Get Your Free Quote →